
Adding a Player to an Active Campaign
Use the Players panel to add player characters to an active RollQuest campaign. After adding a player, you can edit their profile image, character details, stats, board visibility, token behavior, dice colors, and user assignment.
1. Open the Active Campaign
From your RollQuest dashboard, open the campaign you want to manage. If you are the campaign creator or Game Master, click Continue Game on the campaign card.
RollQuest opens the game table. The game table shows the map or grid area in the center and the campaign menu on the left side.
2. Open the Players Panel
From the left campaign menu, click Players. The Players panel opens. This panel shows all player entries already added to the campaign.
3. Add a New Player
Click Add Player. The Add New Player window opens.
Enter the player name in the Enter player name field. This is the name that appears in the Players panel and helps identify the player during the campaign.
After entering the name, choose a player color. RollQuest displays the selected color using a color preview and hex value. Click Create.
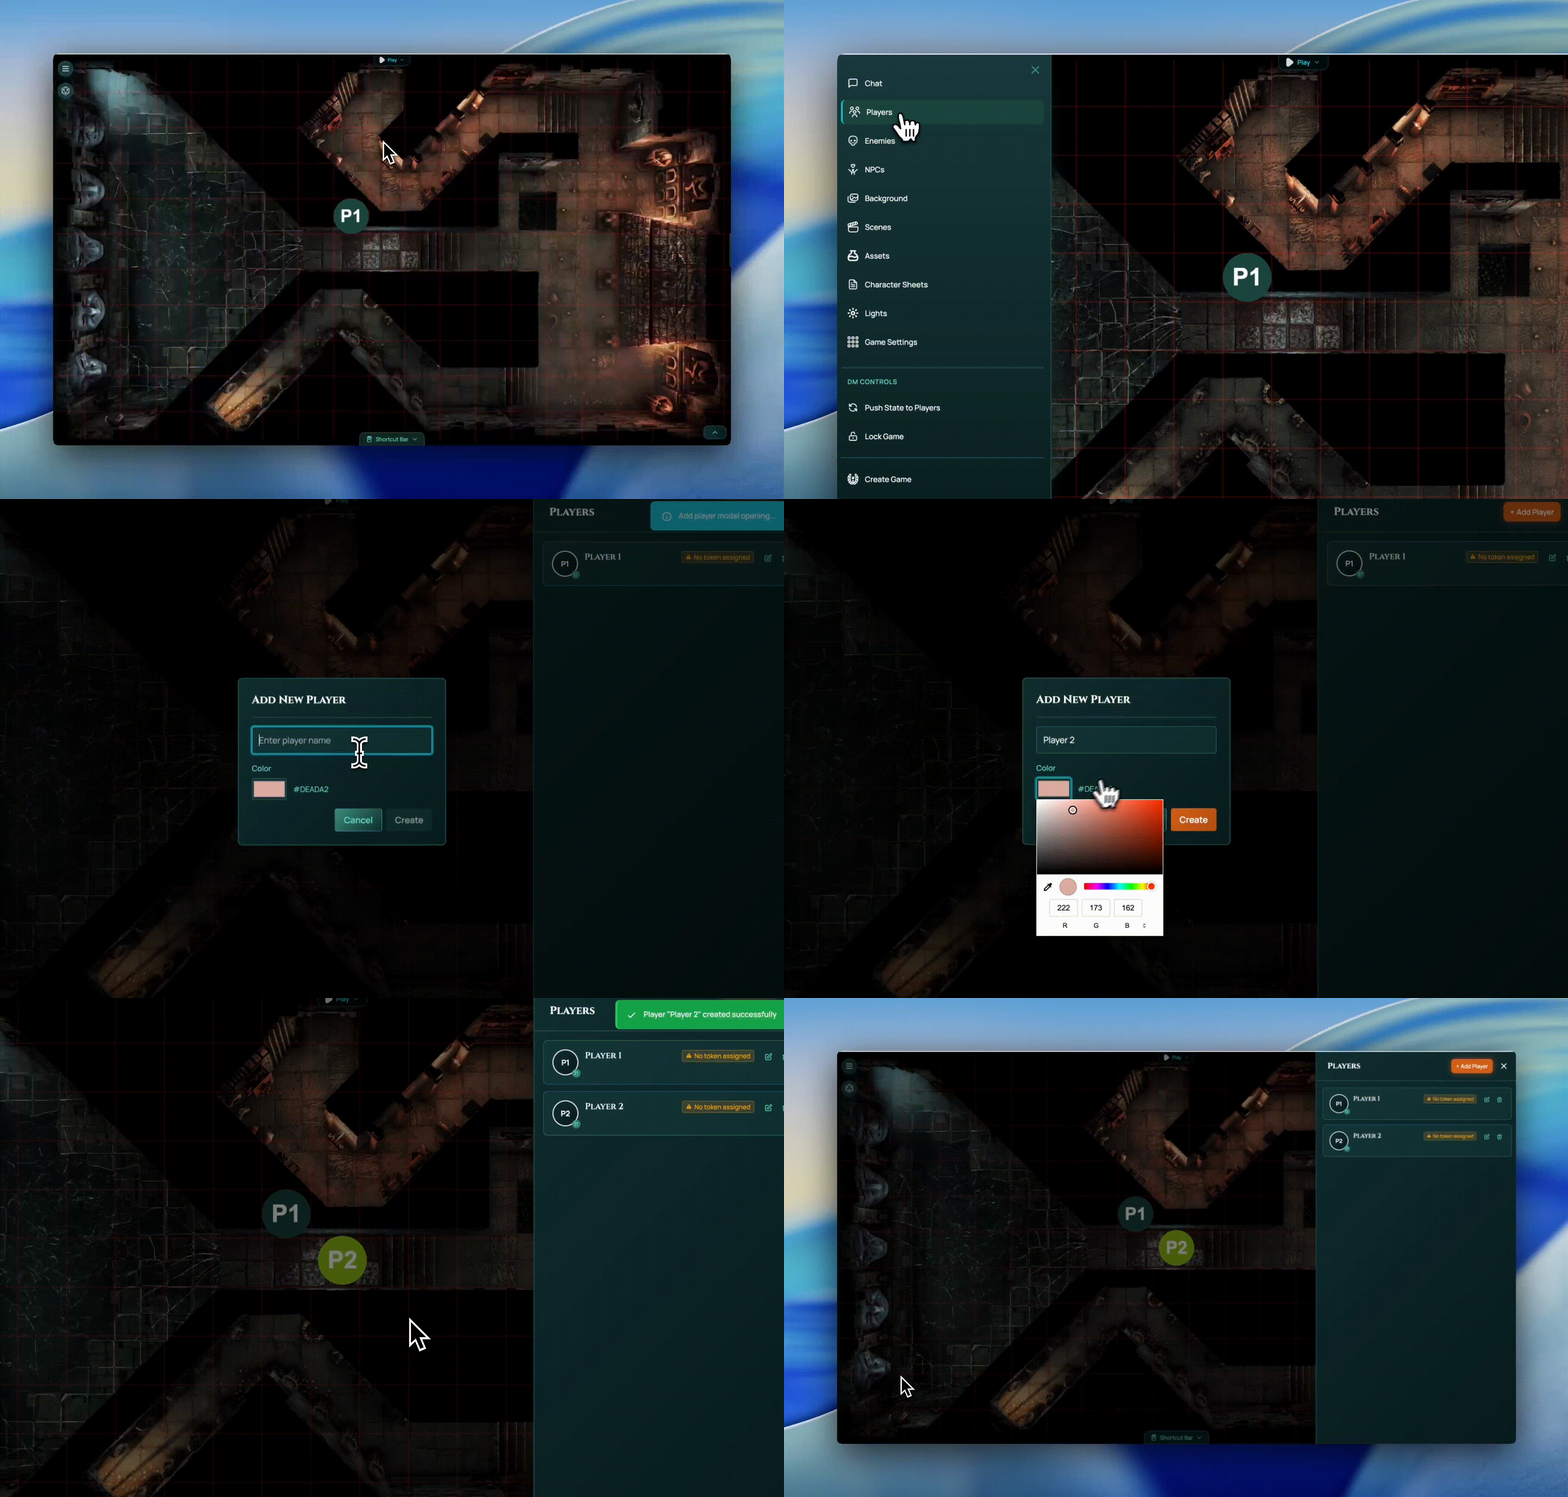
RollQuest adds the new player to the Players panel.
4. Review the Player Entry
After creating the player, return to the Players panel.
The new player appears as a player card or row. The card shows the player’s avatar or initial, character name, selected color, and current setup status.
If the player has not been fully configured, RollQuest may show a warning such as No token assigned. This means the player exists in the campaign, but some setup is still missing.
5. Open the Player Editor
To edit a player, click the Edit icon on the player row. The Edit Player window opens.
This window contains the full player configuration form. Use it to control how the player appears, how their token behaves, what information is visible on the board, and whether the player is assigned to a user.